

v1.11 is here:
Life is Strange: Photographer Mod
By IDK31
Photograph Arcadia Bay like a pro with this freecam and screenshot tool. Includes: DOF, tonemapping, HUD toggle, game speed, and more.
Getting Started
This mod requires another program called Cheat Engine (download below). It is used to modify values stored in memory (eg. cheat). In this case, I'm using it to move the camera and change a few aspects of the game. NOTE: Be careful not to use this program in a multiplayer/online game. If you're a multiplayer gamer, there is potential for a VAC ban from Steam. For the purpose outlined in this guide, Cheat Engine is fine to use, but to be safe close it after you're done playing.
REQUIRED FILES:
Cheat Engine[[Link]]
Life Is Strange: Photographer Mod v1.3
Once you have all the files, follow these steps:
Launch Life Is Strange
Launch Cheat Engine
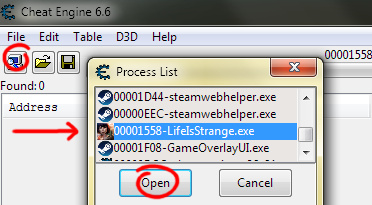
Attach Cheat Engine to Life Is Strange by selecting "LifeIsStrange.exe" after clicking the highlighted computer icon (or go to File > Open Process).
Load the file you downloaded, "LIS_PhotoMod1.3.ct," in Cheat Engine
Press F2 as indicated in the file to activate the camera script
Press PAGEDOWN to unlock the freecam and move with the numpad keys
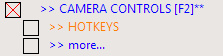
If you do not have a red "X" next to ">> CAMERA CONTROLS" it means the script did not activate and something went wrong. It could mean that all the steps were not followed, I screwed up, or there was a patch that broke it. If so, I'm sorry and am probably working on a fix. Otherwise, keep reading.
Contacting me: Leave a message below or write to IDK31freecam@gmail.com if you need help.
Camera Controls
With "CAMERA CONTROLS" active and camera unlocked, you can use the numpad keys to move. There are a lot of keys. So, to save space there are 2 modifier keys which change what the numpad keys do. You must press the modifier and numpad key at the same time. Basically, with no modifier you can position yourself. PLUS lets you pan or aim at the target like a camera on a tripod and ENTER lets you move like you're on a dolly. You can rotate around or orbit the target and perform a Hollywood-style dolly zoom.
HOTKEY
PAGEDOWN Freecam on/off
C, F, T (While held) move slow, fast, "Hella" fast ([key]+ALT to toggle)
Below, numpad numbers
(mod: none) 8, 5, 4, 6, 9, 7 Fly forward, backward, left, right, up, down
(mod: none) 3, 1 Fly up, down (camera only)
(mod: none) 2 Toggle height lock
(mod: PLUS) 8, 5, 4, 6 Aim up, down, left, right
(mod: PLUS) 9, 7 Zoom in, out
(mod: PLUS) 1, 3, 2 Tilt left, right, [reset tilt]
(mod: ENTER) 5, 8, 6, 4 Rotate up, down, left, right
(mod: ENTER) 9, 7 Move closer/farther away from target
(mod: ENTER) 3, 1, 2 Dolly zoom in, out, [reset zoom]
It may help to know that the camera always points at an invisible target. Movement is done by moving one or the other (camera or target) or both in tandem. You can judge where the target is by using the rotate keys. When you first unlock the camera, the target will be where the player was. TIP: Move the camera close to your subject, then use MOVE FARTHER rather than FLY BACKWARDS and use the rotate keys to line up your shot. This keeps the target stationary.
This mod can also remember nine camera settings to help you get the perfect shot. This can be used to save your place if you need to go do something in game then go back to where you were. The hotkeys are as follows:
HOTKEY
Below, standard numbers
ALT+[number 1 to 9] Save camera settings
[number 1 to 9] Load saved camera settings
0 (zero) Undo (load previous settings)
Player Controls
With CAMERA CONTROLS enabled, you can hide (or unhide) Max with H should she be in the way of your shot. You can also precisely position her with ALT+E (turn right) and ALT+Q (turn left). If you want a certain pose, there is something called "Idle pose countdown" in PLAYER SETTINGS. Lock this at zero (set value to 0 and tick the box) to keep Max posing. It will be random which one she chooses. You'll have to be patient to get the right one.
HOTKEY
H Hide or unhide Max
ALT+Q, ALT+E Turn Max left, right
If you need to get Max around an invisible wall without "ghost" (advanced users will understand), you can use the "jump" key (activate OTHER > GRAVITY (JUMP)). Holding down spacebar will reverse gravity as a way to "jump" over it. Let go of spacebar to fall. Max can fall infinitely high with no problem provided that there is solid ground. If you encounter non-solid ground, press space to stop falling. Return to solid ground, then press G (zero gravity). When you walk over the same area you will not fall.
HOTKEY
Spacebar Float up (release to fall)
G Toggle gravity on/off
Depth Of Field
Depth of Field (DOF) is used in Life Is Strange during cutscenes to focus attention on something or someone. I've made DOF settings available during normal play. I, J, K, L will edit the foreground settings. Adding ALT will change the background. Focus with J and L. Notice L with the hard edge focuses and J with no edge blurs. I and K are used to move the focus area forward and backward.
With COLOR AND EFFECTS active, the DOF hotkeys are:
HOTKEY
O Toggle DOF on/off
P Load DOF preset (Max and foreground out of focus)
C, F Slower, faster adjustments
L Foreground focus more
J Foreground blur more
I Push foreground area forward
K Pull foreground area back
ALT+L Background focus more
ALT+J Background blur more
ALT+I Push background area forward
ALT+K Pull background area back
N Focus near and blur far (N for near)
M Focus far and blur near (M for far as in "mountains")
Cutscene settings can be changed while no-menu paused (see "Picture-Taking Tips" later in the guide for details). If you want your settings to persist, you should lock the values by ticking the boxes next to them. Cutscenes have their own preferred settings and may try to overwrite your settings. There will be brief moments where the two "fight it out."
Tonemapping
As with DOF, with COLOR AND EFFECTS active you can change the tonemapping in game. Just press PAGEUP to start color-editing mode (cancel freecam) and use the numpad keys to edit a specific color range. Like camera settings, there are 9 save slots for color which I have preloaded with settings. You can write over these if you choose.
Color presets:
HOTKEY
PAGEUP Color-editing mode on/off
Below, standard numbers
1 Warm colors (red tint)
2 Cool colors (blue tint)
3 Vintage (washed out shadows and yellowed)
4 Autumn (enhanced reds, browns, yellows)
5 Black and white - Warm
6 Black and white - Cool
7 Sepia (yellowed black and white)
8 Noir (hard black and white)
9 Default colors
ALT+[number 1 to 9] Overwrite slot with current color settings
[number 1 to 9] Load preset or overwritten values
0 (zero) Undo (load previous settings)
Like the camera, there are modifiers which change the tonal range to edit and each has a special key. With no modifier you can edit highlights and desaturation. With PLUS you can edit midtones and gamma. With ENTER you can edit shadows and contrast. Finally with MINUS, you can edit overall tint (no special key).
Color-editing hotkeys:
HOTKEY
PAGEUP Color-editing mode on/off
C, F Slower, faster adjustments
Below, numpad numbers
7, 4 RED up, down
8, 5 GREEN up, down
9, 6 BLUE up, down
3, 1 *Special up, down
(mod: none) RGB: highlights, *Special: saturation
(mod: PLUS) RGB: midtones, *Special: gamma
(mod: ENTER) RGB: shadows, *Special: contrast
(mod: MINUS) RGB: tint (after saturation), *Special: none
Shooting In Hi-Res
You might be asking yourself how to create 4K (or larger) shots. Here's how: GeDoSaTo. It allows you to render the game at a higher resolution than your monitor. First, it renders at some crazy resolution you choose, say 3840x2160 (or 8000x2000 for example assuming your video card can handle it). Then, it shrinks the image down to fit on your sceen. This is called hotsampling or downsampling. Screenshots can be taken at the higher resolution.
OPTIONAL FILE:
GeDoSaTo[blog.metaclassofnil.com]
Here's a brief run-through of the steps needed to shoot in hi-res:
Install and start GeDoSato (don't start the game yet)
Add Life Is Strange to the whitelist
Add resolutions you want to shoot
Bind a screenshot button
Edit your Life Is Strange .ini file (optional)
Use my mod to unlock any aspect ratio (optional)
First, GeDoSaTo has something called a whitelist which is a list of games you want to make GeDoSaTo available to. You don't always want it on because it will slow down your game. So, click on "Whitelist" (not the User one) and add Life Is Strange by adding this line:
LifeIsStrange || Life Is Strange
Next, you need to decide what resolutions you want to be able to shoot. 4K is 3840 by 2160 which is about 8 megapixels. Calculate the megapixel count by multiplying Length × Height and divide by 1,048,576 (2^20). You'll need to think about megapixels (MP) when shooting. Life Is Strange will begin to stutter beyond 10 MP. After 20 the stuttering gets almost unplayable. So, aim for 8-15 MP. Here are some standard sizes you can add when you click on "Edit Settings" (2, 3.5, 8, 14 MP):
renderResolution 1920x1080@60
renderResolution 2560x1440@60
renderResolution 3840x2160@60
renderResolution 5120x2880@60
Now, you will need to bind a screenshot key. Delete the "#" in front of the line "#takeFullScreenshot VK_DIVIDE" and you will be able to use the "/" (divide) key to take a hi-res screenshot. If you want it to be a different key, you'll have to look up the VK codes[[Link]] and change it. Screenshots by default are saved here: "C:\GeDoSaTo\screens\[GAME]"
Having done the above, you should be able to start Life Is Strange and see/select the new resolutions in display settings. Don't forget GeDoSaTo needs to be running before Life Is Strange each time and you need to press the special screenshot key. Not F12. These shots cannot (easily) be added to Steam. If you must upload to Steam, you'll have to copy over a shot (preserving the original name) that you've taken in Steam and delete the thumbnail.
This may not be required for all users, but I had to set one thing to TRUE in "Edit Settings" due to not being able to use the menu properly. If you have the same problem, change this line to read:
forceAlwaysDownsamplingRes true
When you change resolutions, GeDoSaTo will flash a message on the screen. By default, this message can take a long time (10 seconds) to clear, so you might also want to set this:
messageSeconds 1
The below is optional and for advanced users who want to shoot at non-standard aspect ratios and use hotkeys to quickly swap between them.
If you want to quickly set a resolution, you can bind a key to the "setres" command in your .ini file "LifeIsStrangeInput.ini." You can find it here:
"...[USER]\Documents\My Games\Life Is Strange\LifeIsStrangeGame\Config."
You'll need to add a line under "[Engine.PlayerInput]" and format it like this:
"Bindings=(Name="[KEY]",Command="setres [X]")."
KEY is a key like F10 and X is a resolution of the form LENGTHxHEIGHTf. Example: "Bindings=(Name="F10",Command="setres 3840x2160f")." The "f" is necessary and means fullscreen. You can also bind a key to the "talk" command to get to the dev console and type out other commands from there (after deleting "say").
To bind the same GeDoSaTo resolutions we made above you would add something similar to this:
Bindings=(Name="F1",Command="setres 1920x1080f")
Bindings=(Name="F2",Command="setres 2560x1440f")
Bindings=(Name="F3",Command="setres 3840x2160f")
Bindings=(Name="F4",Command="setres 5120x2880f")
Life is Strange will letterbox and pillarbox the screen to preserve a 16:9 or 4:3 aspect ratio. Aspect ratio (AR) is length divided by height. The resolutions we've been using are 16:9 or 1.777 AR. My mod (the download at the top of the guide) will allow you to set any aspect ratio. Go to OTHER OPTIONS > GAME SETTINGS > MORE and you will see Letterbox AR and Pillarbox AR. This is like the minimum and maximum aspect ratio it will begin to add black boxes. To make sure there are none, set Letterbox AR to 0 and Pillarbox to something high like 10.
Here are some example non-standard aspect ratios (but feel free to use anything reasonable):
5040 x 2160 (10 MP, ultrawide 21:9, 2.333 AR)
6480 x 2160 (13 MP, panorama 3:1, 3.0 AR)
5760 x 1440 (8 MP, panorama 4:1, 4.0 AR)
2880 x 3840 (11 MP, portrait 3:4, 0.75 AR)
2160 x 3840 (8 MP, vertical shot 9:16, 0.57 AR)
Picture-Taking Tips
To take "clean" screenshots (no text, icons, or anything that might cover up a shot), activate OTHER OPTION > GAME SETTINGS. Then, you can use these hotkeys:
HOTKEY
F2 Toggle Chromatic Aberration (blurry edges)
F3 Toggle overlays (text, icons, option bubbles, pause menu)
F4 Toggle active outline
A note about character outlines: you must be looking at one to turn it off. This is only temporary. To keep it off, lock the address (tick the box next to it), then the next outline you encounter will briefly pop in then out. Turning off Chromatic Aberration is recommended which makes the edges blurry.
NO-MENU PAUSE
ADVANCED: Edit your .ini file to bind a key in-game to the command "pause" (completely stops the action while still allowing the freecam to move). Locate the file "LifeIsStrangeInput.ini" under ..\Documents\My Games\Life Is Strange\LifeIsStrangeGame\Config. Open it in Notepad. Under "[Engine.PlayerInput]" add the line: Bindings=(Name="F5",Command="pause") and save the file. F5 will now pause the game without the pause menu. If you really want to, you can bind a key to the command "ghost" which will allow you to noclip through the level. You can go up and down with E and Q in ghost form. Unfortunately this is not reversible and you will need to reload the level to undo it.
Slow down the game if the action is moving too quickly or speed it up to breeze through it. Activate the game speed controls (OTHER > GAME SPEED), then the hotkeys are:
HOTKEY
F6 The game runs VERY slow (0.001x)
F7 The game runs medium slow (0.2x)
F8 The game runs somewhat slow (0.5x)
F9 The game runs normal speed (1.0x)
F10 The game runs faster (2.0x)
F11 The game runs VERY fast (5.0x)
I left the screenshot key F12 untouched.
Experimenting
The best way to figure out the mod is to experiment. I don't even know what all is possible. Perhaps someone will find something unexpected. For instance, I did something unexpected while Max was flying Brooke's drone. I decided to try the camera controls and, suddenly, I had control of the drone (or at least, the effects stuck). Unfortunately, I never found out how to call them up at will.
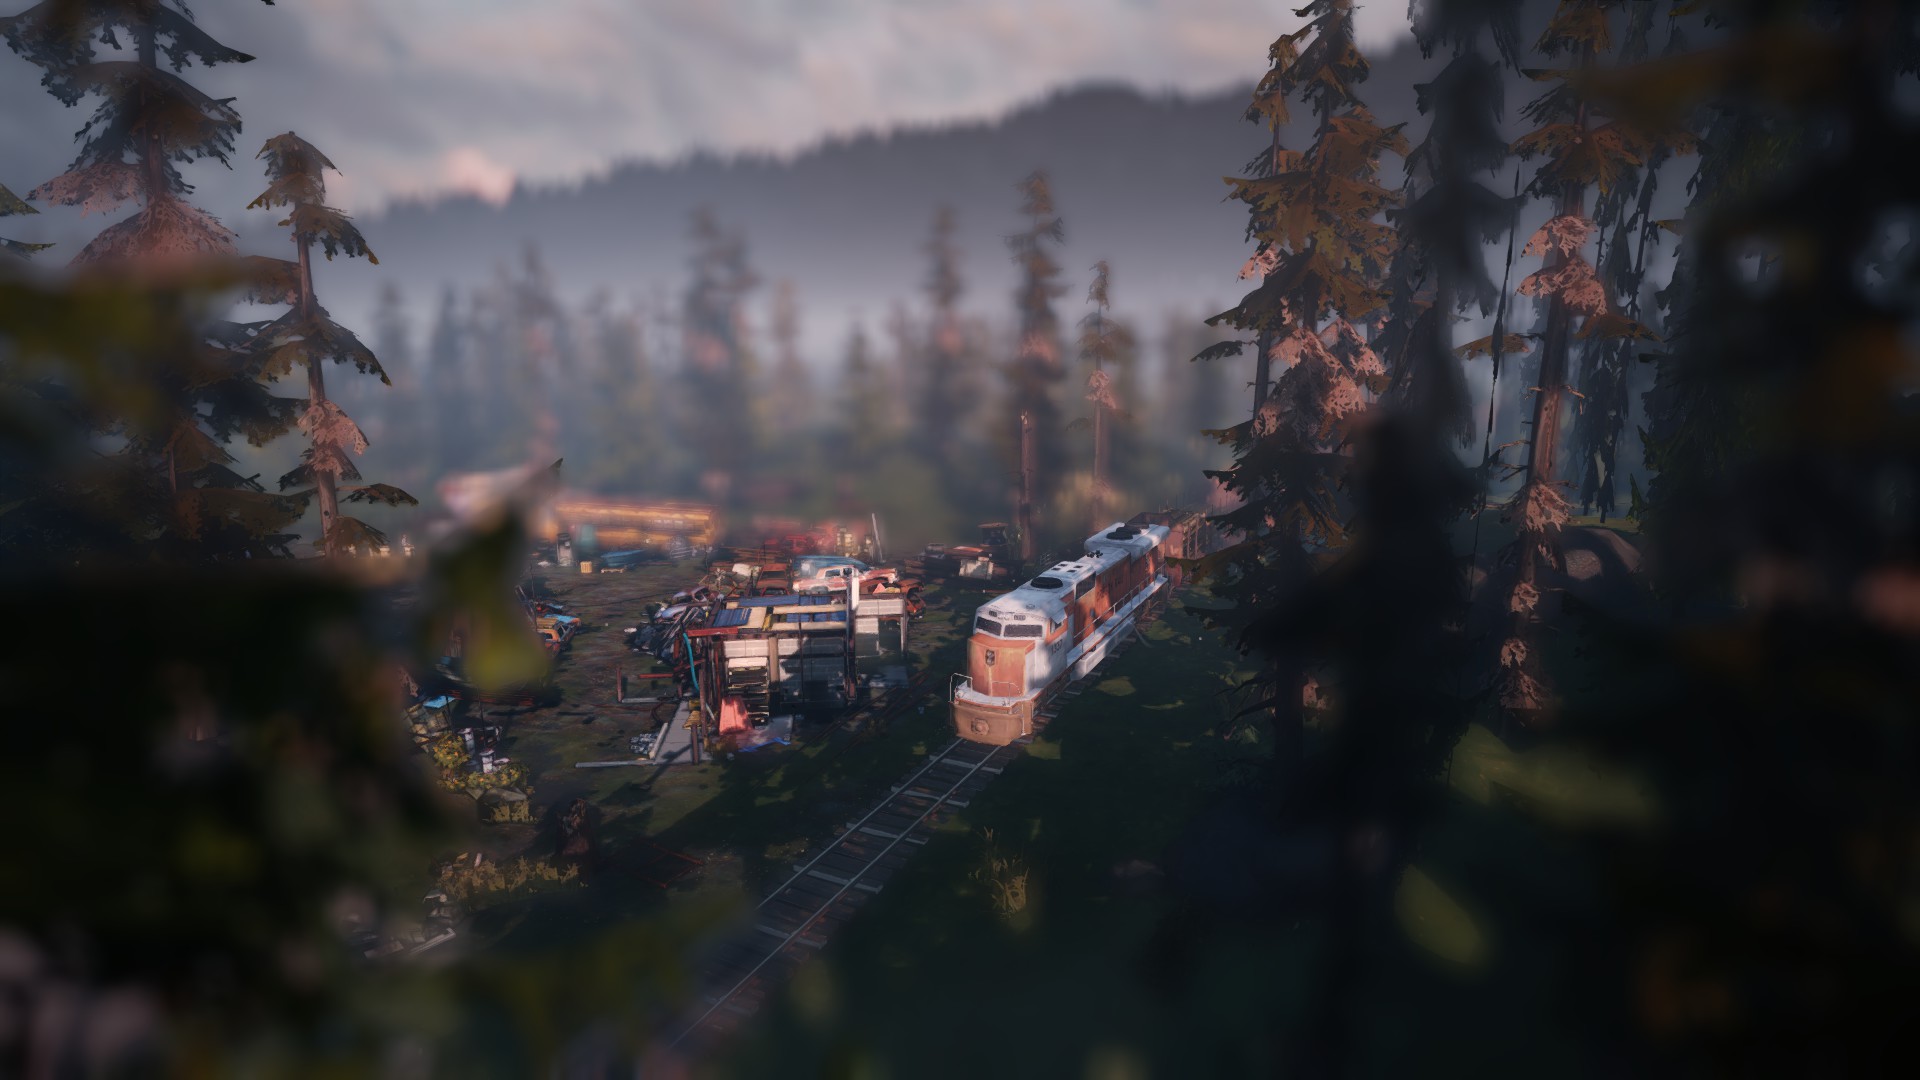
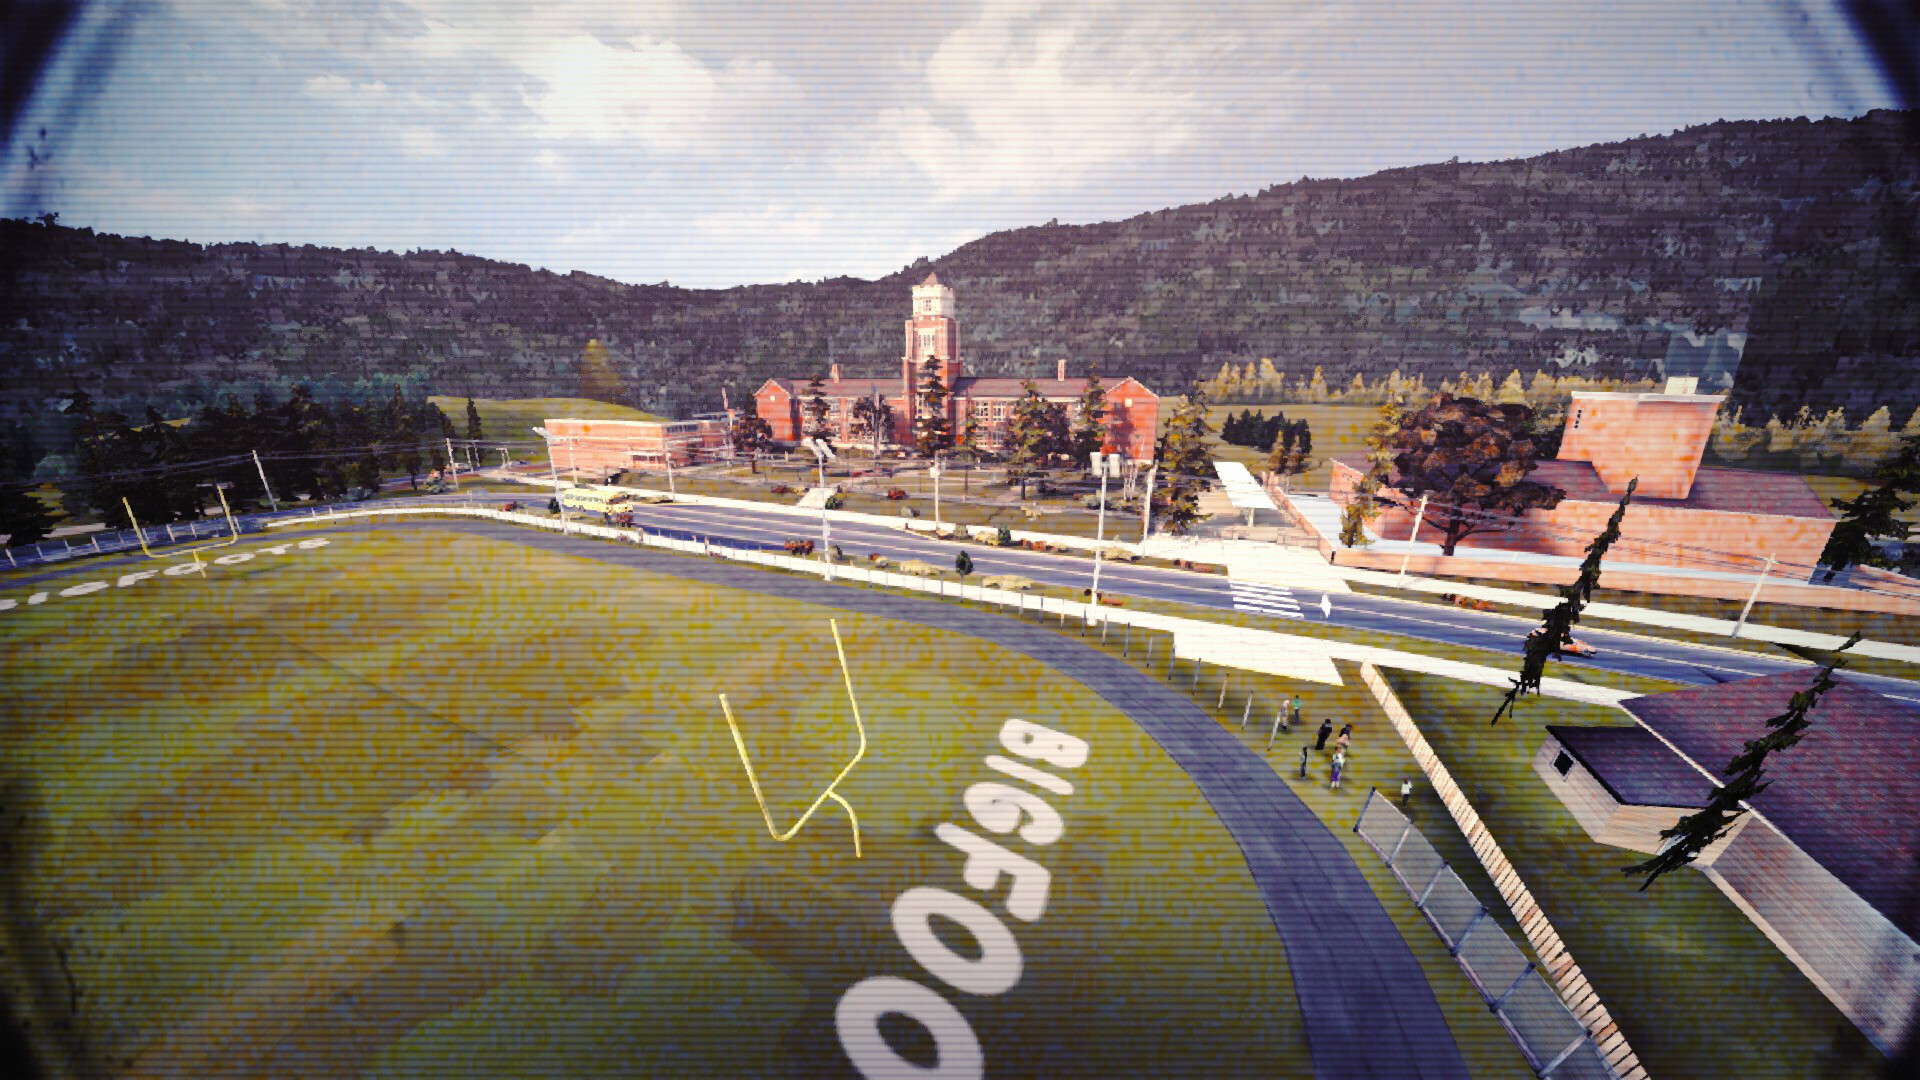
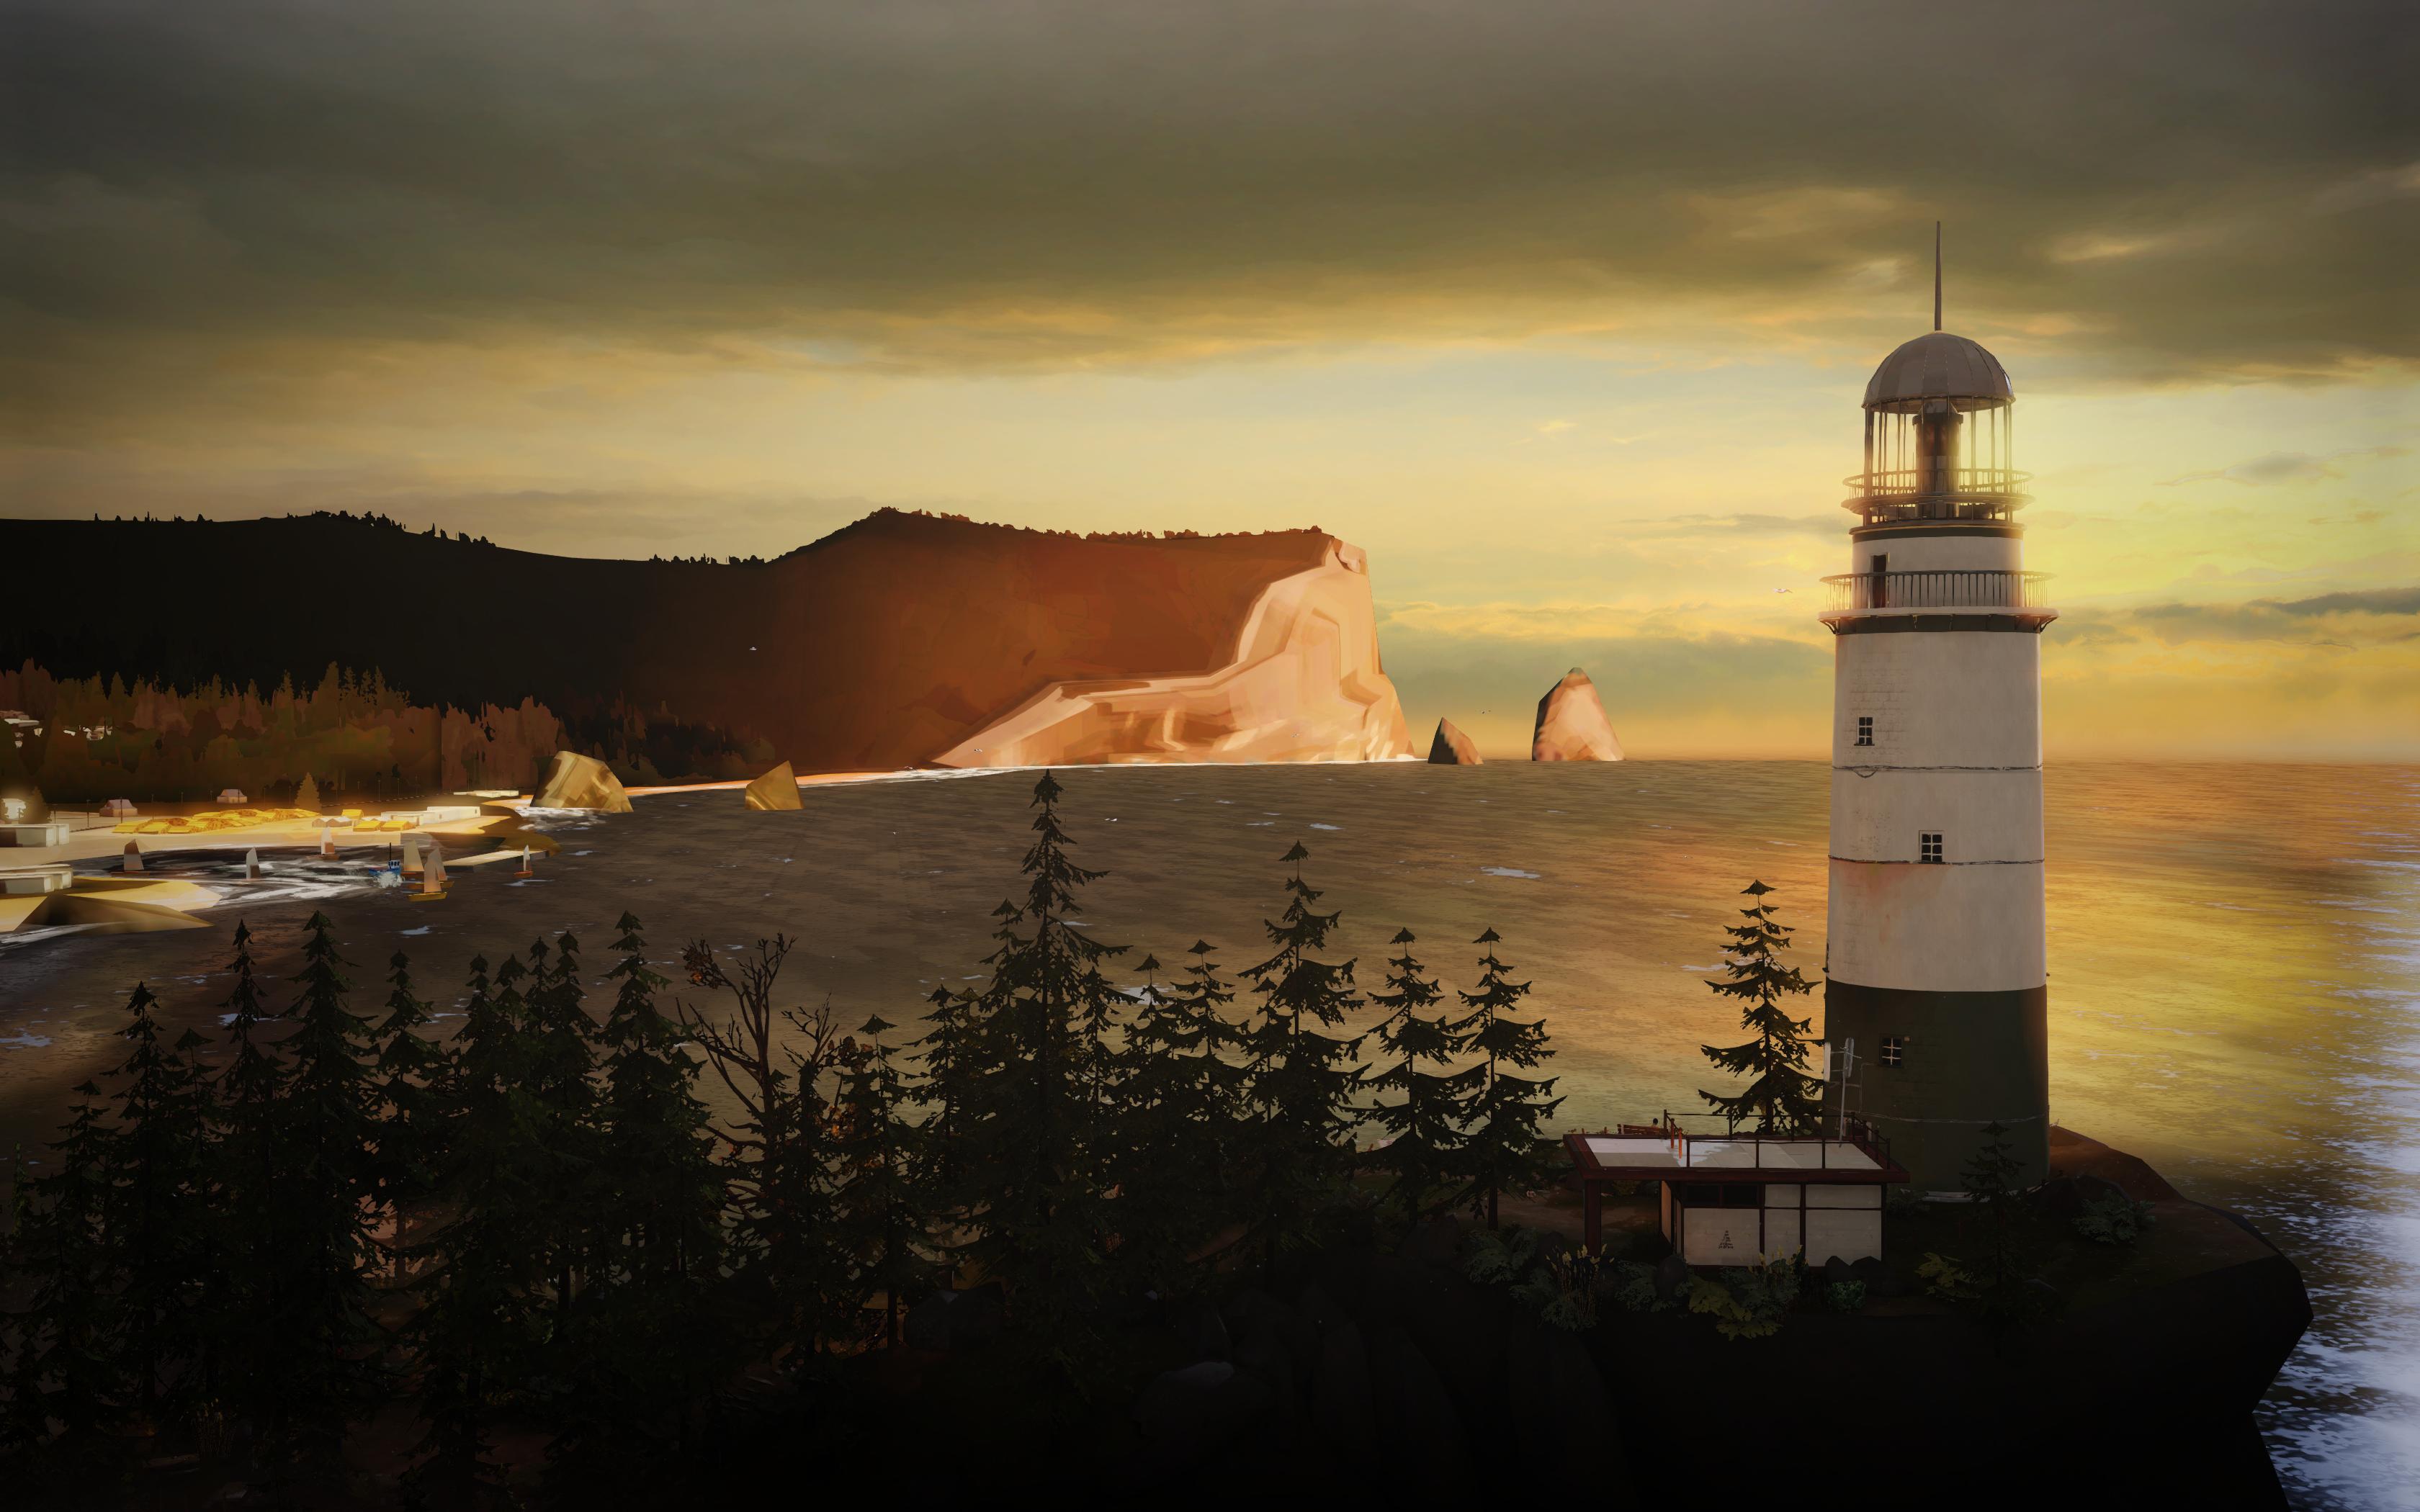
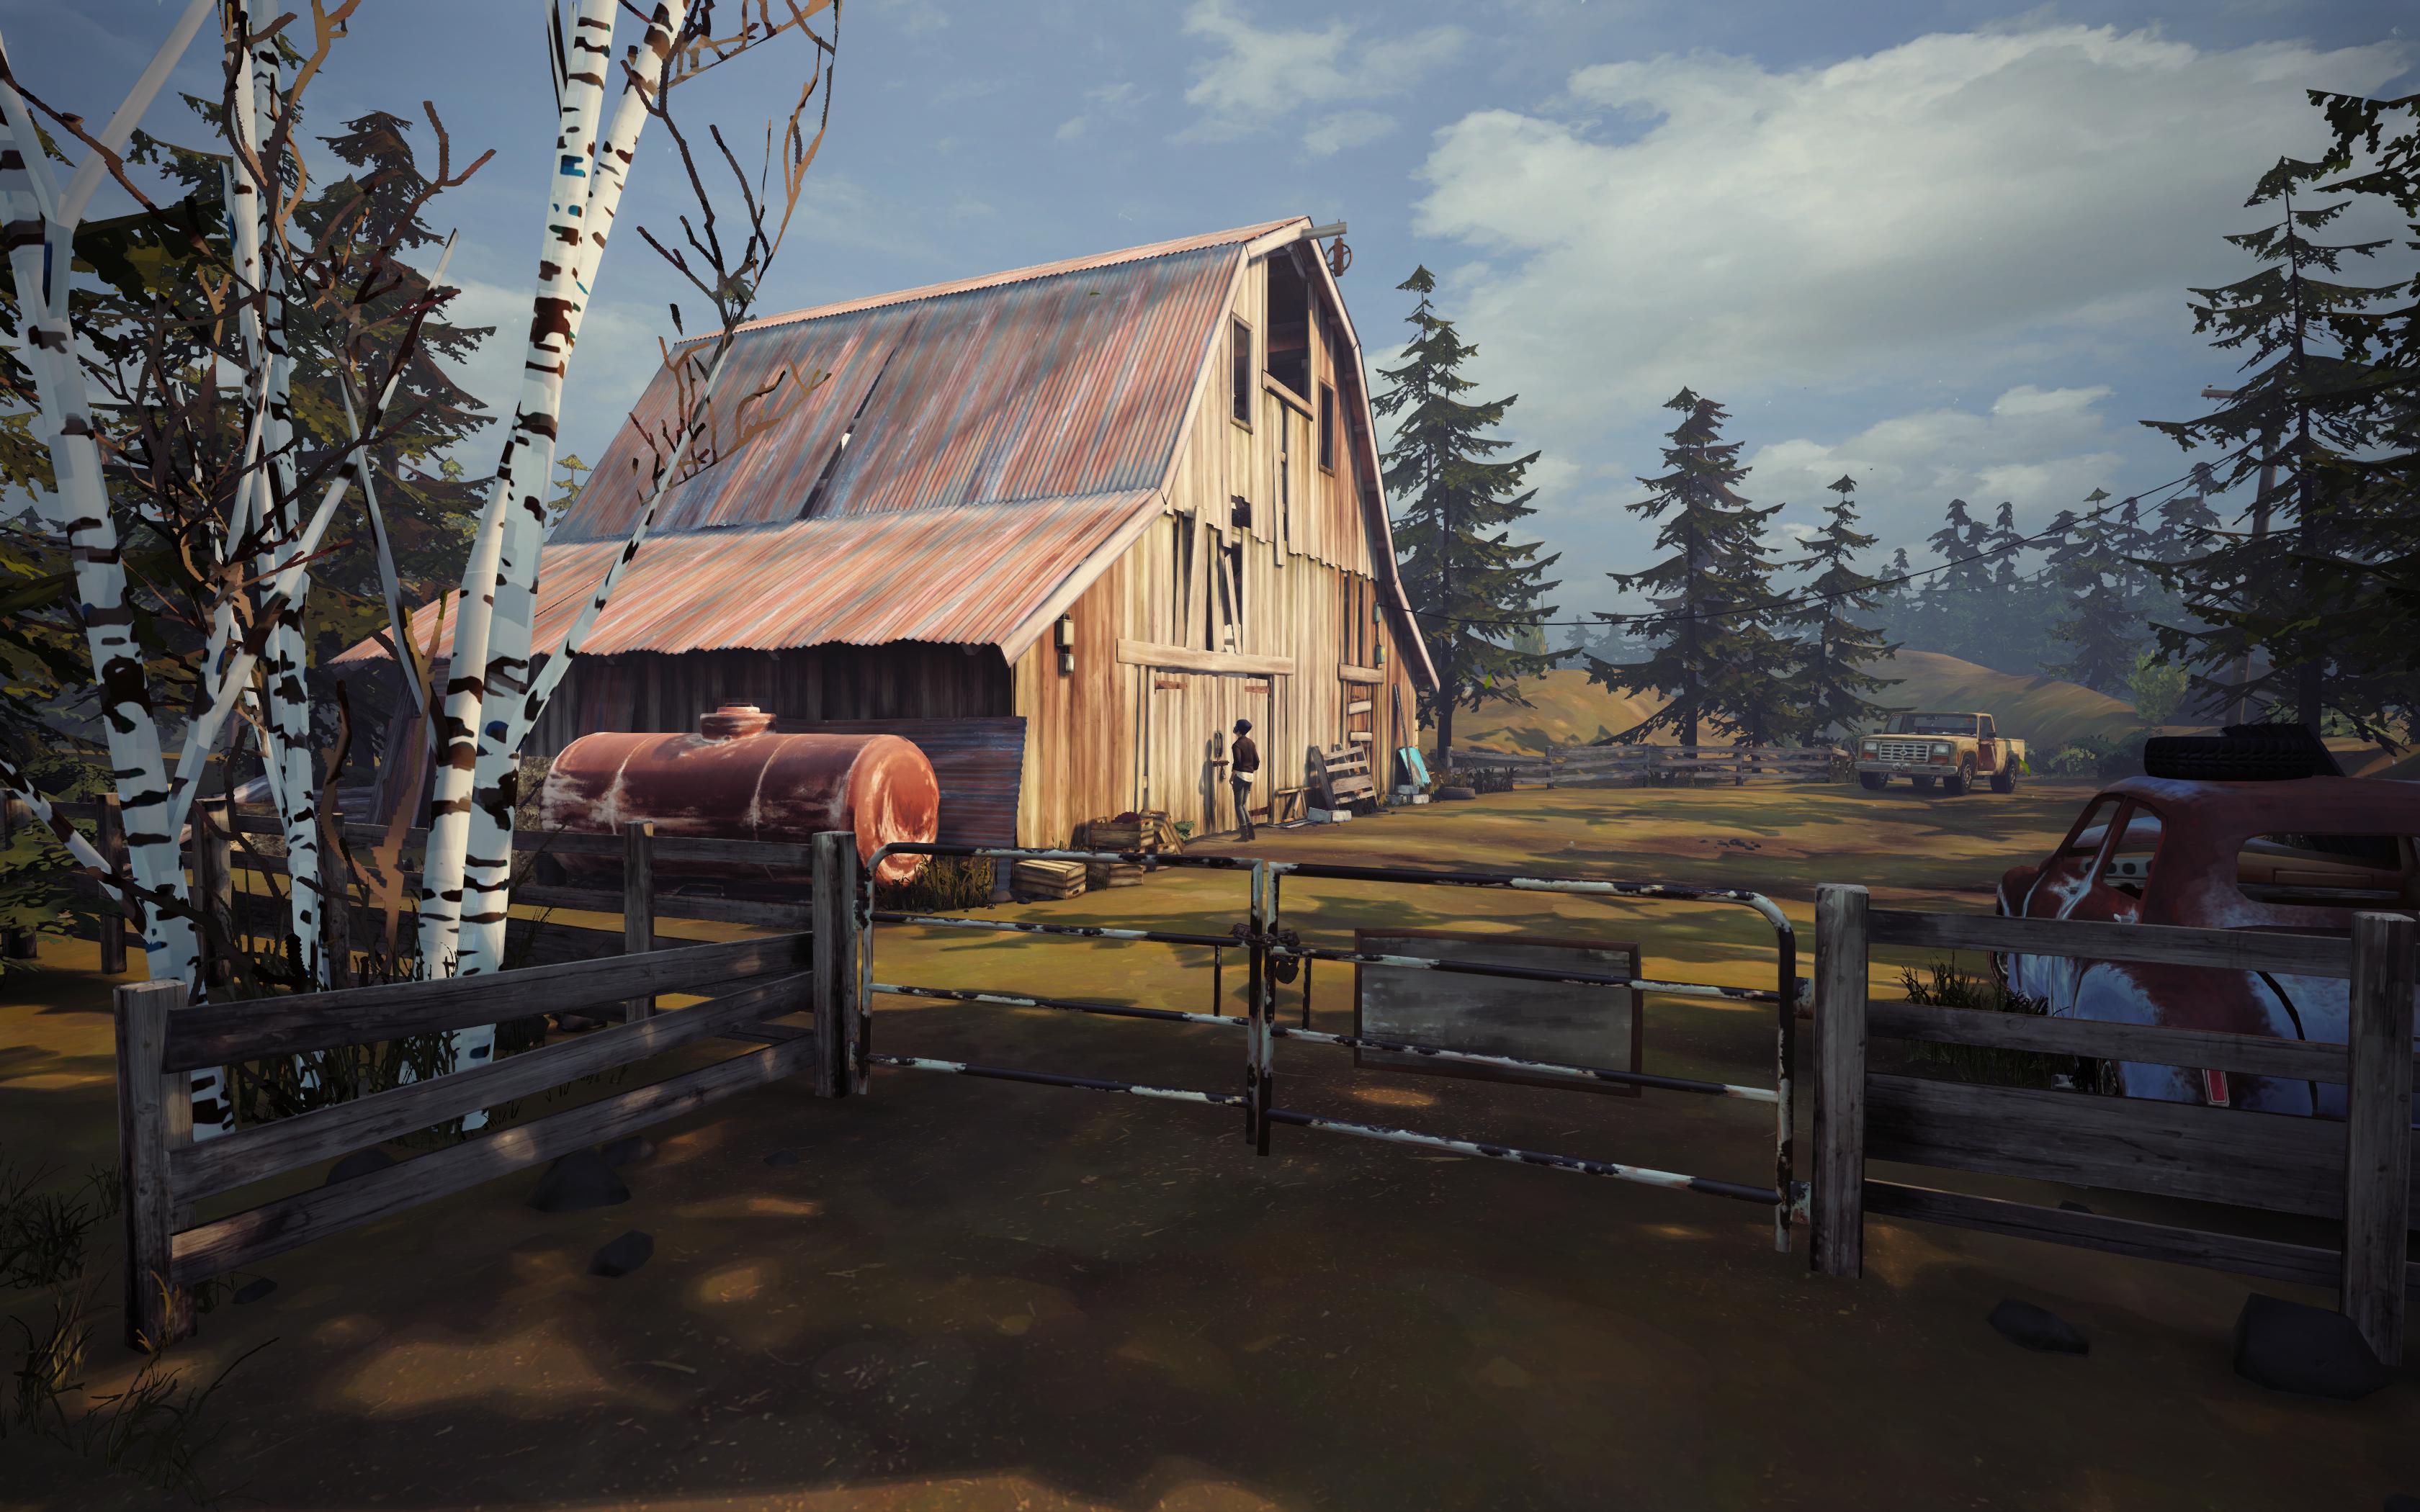
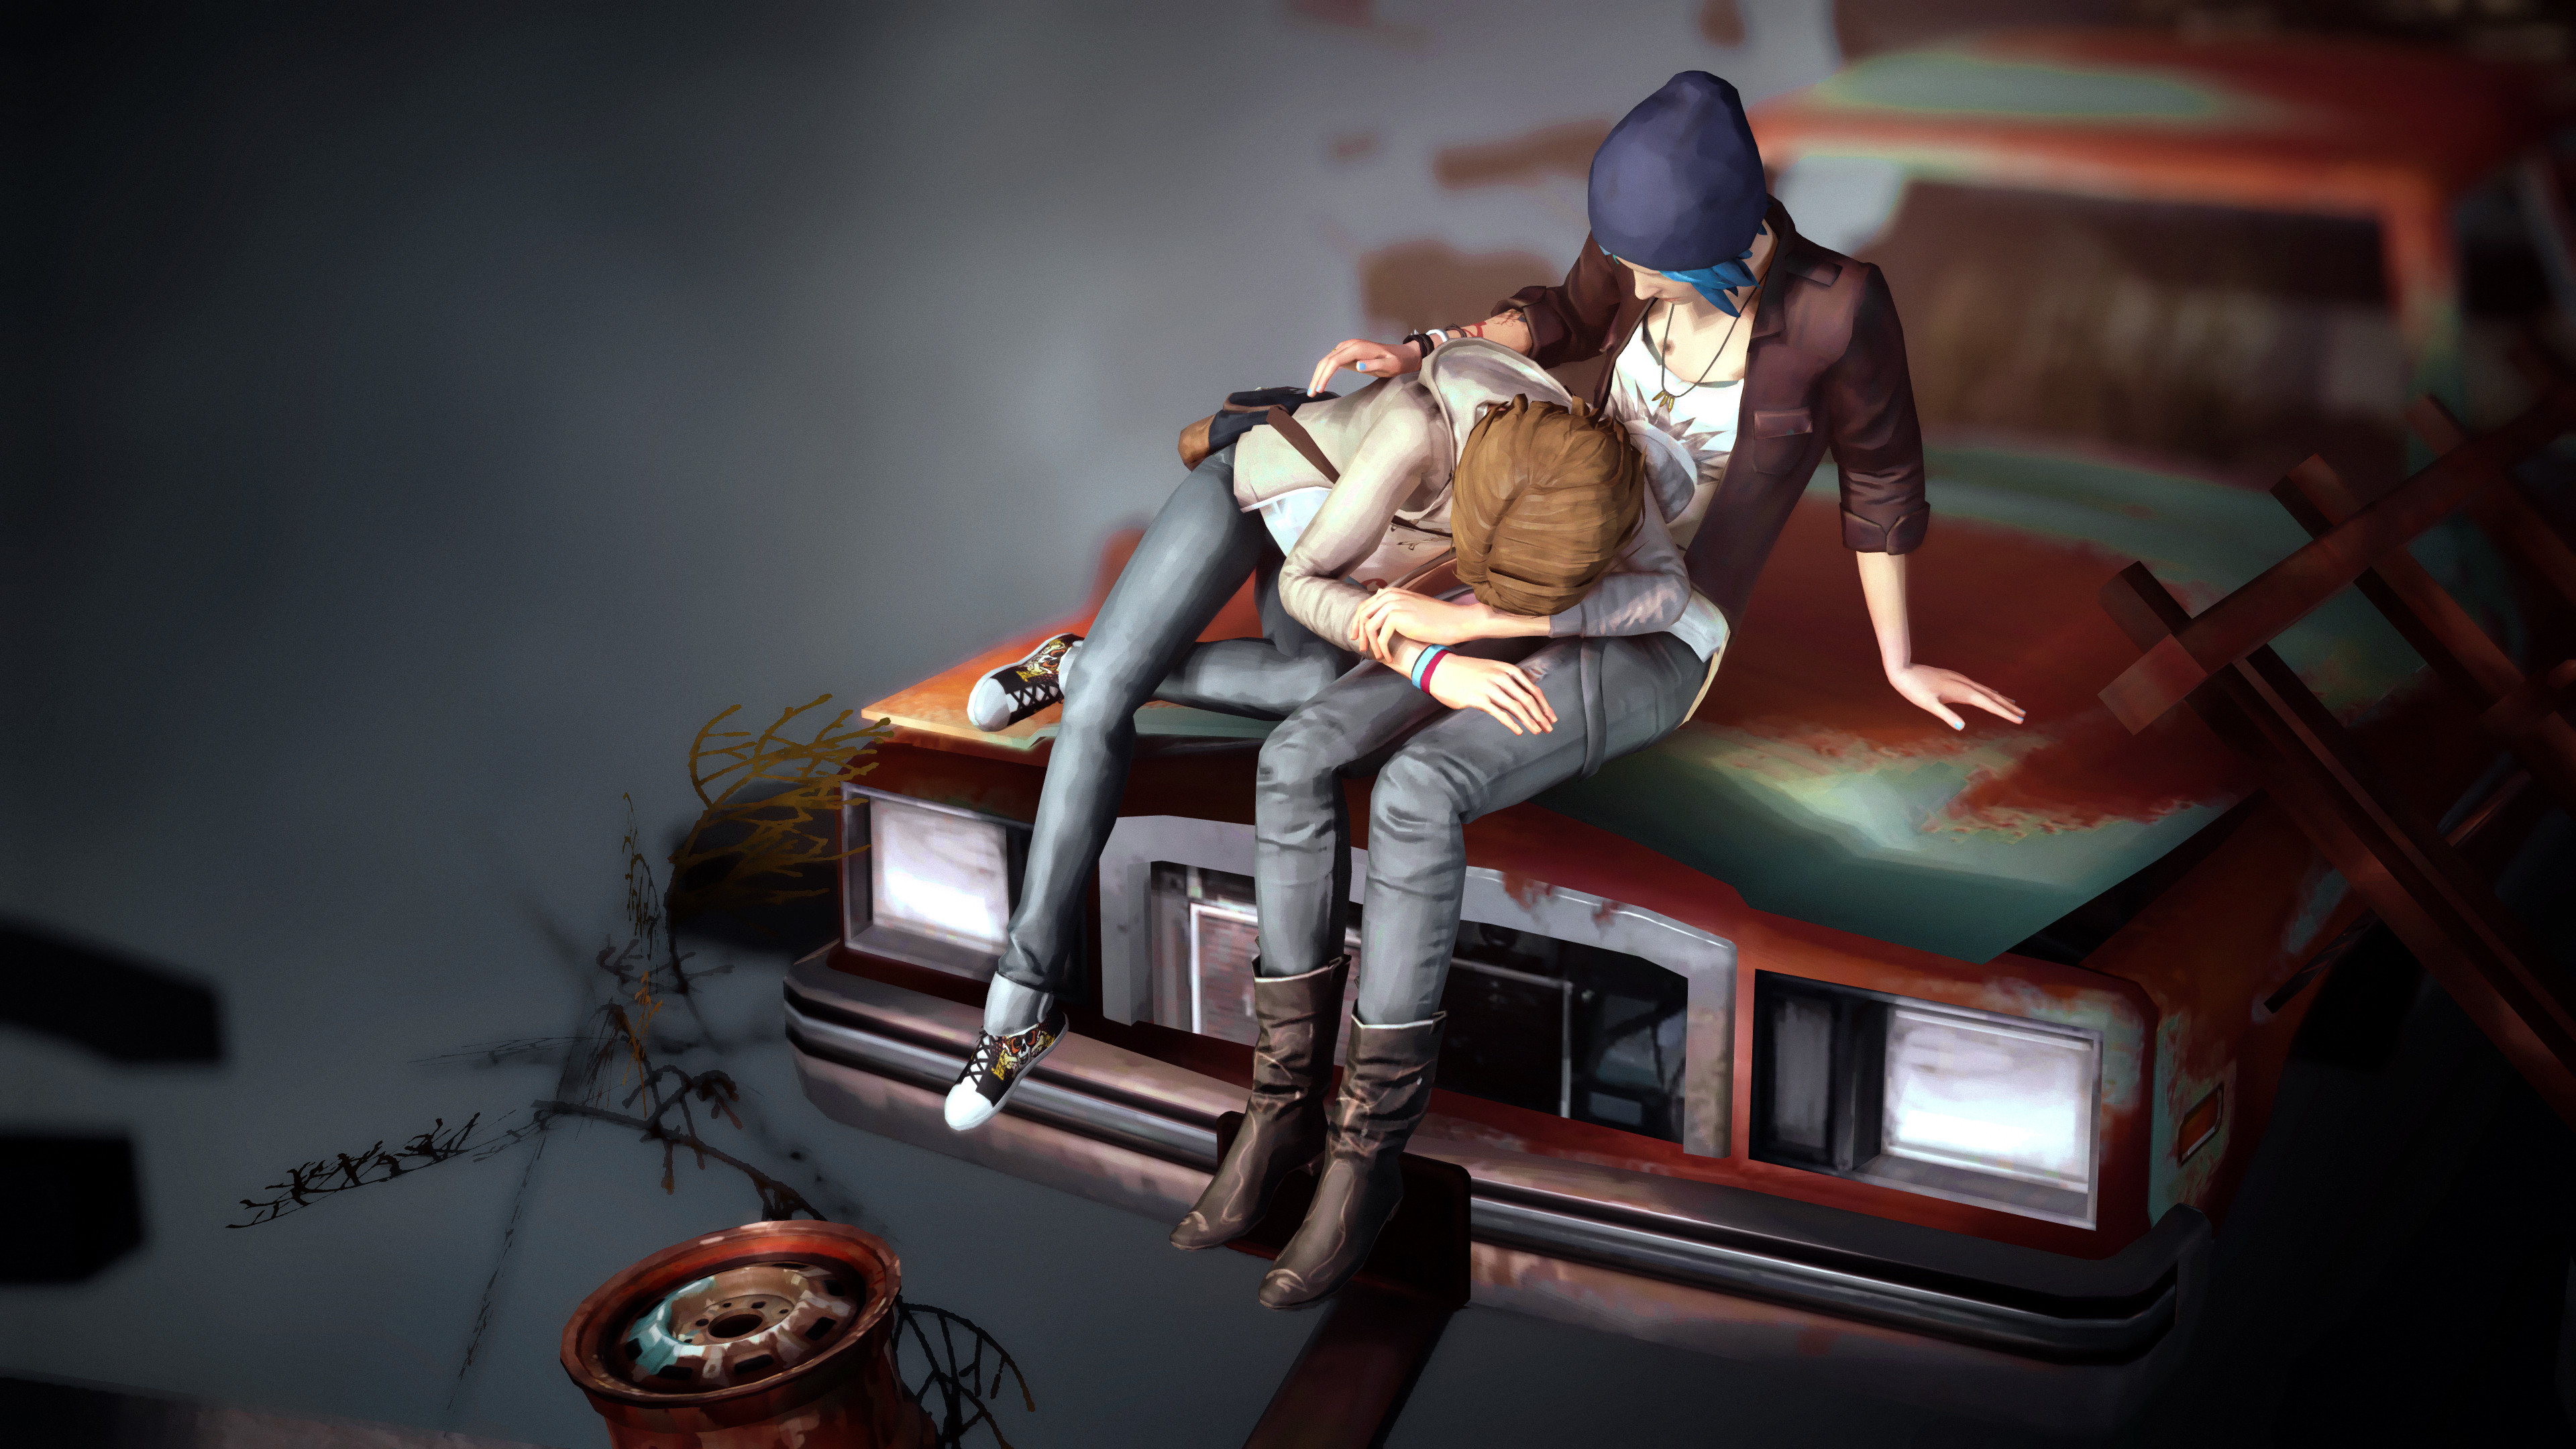
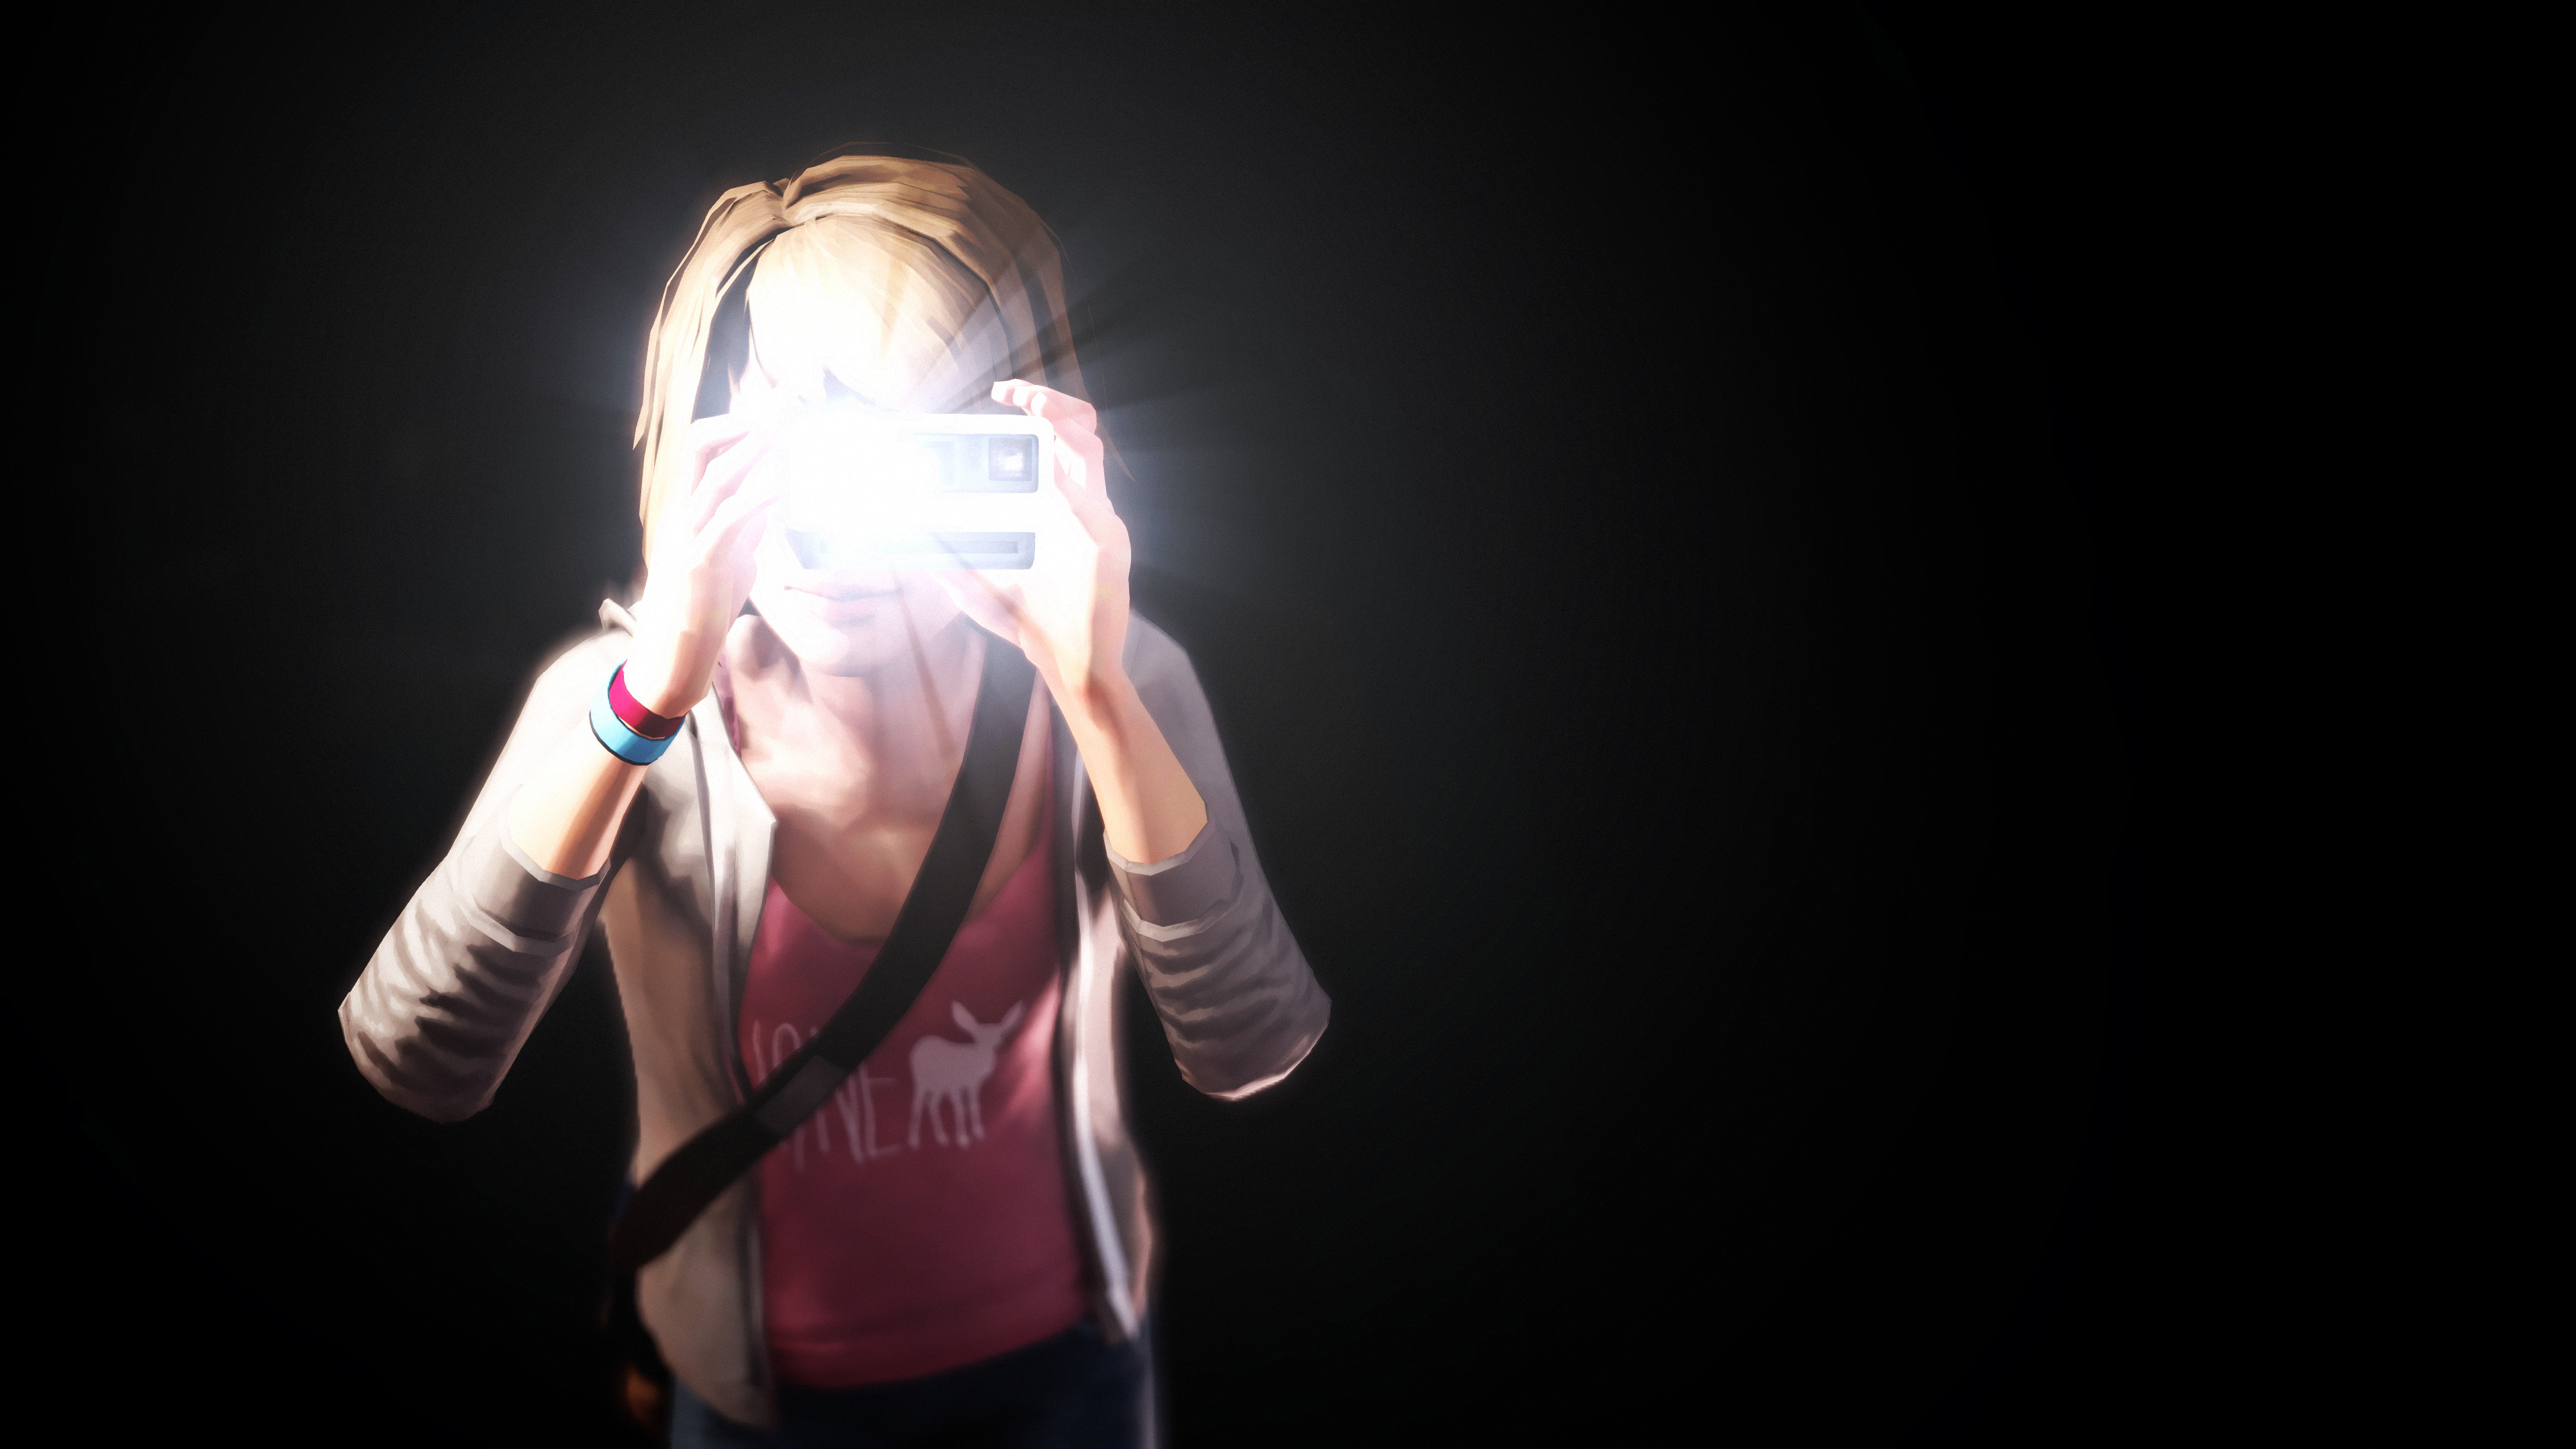
Examples
Photography is a major theme in this game, so I thought it fitting to make this mod. Plus, it has such a beautiful, unique aesthetic — like interactive concept art, but still somehow super-realistic. It makes for some beautiful pictures.
Some of my favorite shots I've taken:

I hope you enjoy this mod and found the guide helpful. Happy snapping and please share your shots!
SPECIAL THANKS:
Thank you Dontnod Entertainment and Square Enix for this beautiful game!
Thank you Cheat Engine Forums community for the positive and immensely helpful support (and never getting tired of my questions).
Thank you Deadendthrills for your awesome screenshots and inspiring this mod and games-as-art culture.
How to use this cheat table?
- Install Cheat Engine
- Double-click the .CT file in order to open it.
- Click the PC icon in Cheat Engine in order to select the game process.
- Keep the list.
- Activate the trainer options by checking boxes or setting values from 0 to 1